Showing posts with label Get in my Belly. Show all posts

Tuesday, November 3, 2009

WANT {pumpkin crème brûlées}

Yes PLEASE! These sound de-li-cious, don't you think? And who knew you could caramelize the sugar under a preheated broiler? Not me! Thanks for the great tip, Lucy from Hungry Cravings!

Pumpkin Crème Brûlées

2 ½ cups heavy cream
6 large egg yolks
1/3 cup sugar
6 ounces pumpkin puree
1 teaspoon vanilla extract
¾ teaspoon cinnamon
¼ teaspoon freshly grated nutmeg
¼ teaspoon kosher salt
¼ cup Turbinado sugar


Preheat the oven to 350˚F. Heat the cream to a simmer in a small saucepan. Whisk together the yolks and sugar in a medium bowl. Continue whisking while adding the hot cream in a thin stream. Strain through a fine mesh sieve. Stir in the pumpkin, vanilla, cinnamon, nutmeg, and salt and skim off any foam from the surface. Divide the mixture among 8 crème brûlée dishes and place them into a roasting pan. Add enough hot water to the roasting pan to come half way up the sides of the crème brûlée dishes and bake for 22 to 24 minutes, or until just set. Remove from the water bath and let cool to room temperature. Refrigerate for 3 to 4 hours, or until firm.

Top 1 crème brûlée with 1 ½ teaspoons of the Turbinado sugar and swirl to coat. Caramelize the sugar with a culinary torch. Finish the remaining crème brûlées with the remaining Turbinado sugar in the same manner. Serve immediately.

Serves 8. Canned pumpkin puree is perfect for this recipe. You can tell that the crème brûlées are done when they jiggle like gelatin. If you don’t have crème brûlée dishes, you can use ramekins, but they will take slightly longer to bake. And if you don’t have a culinary torch, you can caramelize the sugar topping under a preheated broiler. Crème brûlées may be baked a day or two in advance and kept covered with plastic wrap in the refrigerator. Add Turbinado sugar and caramelize just before serving.

Monday, October 26, 2009

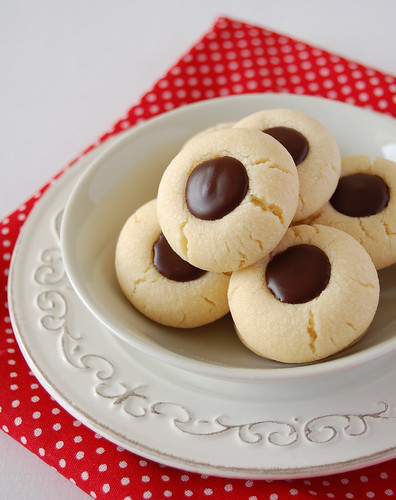
LOVE {chocolate thumbprint cookies}

Mis cookies favoritas= chocolate thumbprint cookies. When I was a little girl, my mom used to buy these from the bakery of our local grocery store. You can imagine how many nights I spent secretively eating entire boxes of these delicious little treats after she went to bed. Mmm. Looks like I'll be making a batch of these tonight! :o)


Chocolate Thumbprint Cookies, via Technicolor Kitchen

Cookie dough:
½ cup {1 stick} unsalted butter, room temperature
½ cup confectioners' sugar, sifted
¼ teaspoon salt
1 teaspoon pure vanilla extract
1 ¼ cups all-purpose flour, sifted

Filling:
2 tablespoons unsalted butter, room temperature
2oz semisweet chocolate, chopped
1 teaspoon light corn syrup


Preheat the oven to 350ºF; line two baking sheets with baking paper.

Start by making the dough: in the bowl of an electric mixer fitted with the paddle attachment, beat together the butter, sugar, salt, and vanilla on medium-high speed until smooth, about 2 minutes. Beat in flour, beginning on low speed and increasing to medium high, until a dough forms – it won’t be sticky.

Roll dough by teaspoonfuls into balls, and place 1in. apart onto prepared sheets. Bake for 10 minutes, remove from oven, and press thumb, or the backside of a measuring spoon, into tops of cookies to make indentations. Return to oven, and bake until light brown on the edges, 7 to 9 minutes more. Remove to a wire rack to cool.

Make the filling: combine chocolate, butter, and corn syrup in a small heatproof bowl. Set over a pot of simmering water; stir occasionally until melted and smooth. Allow to cool slightly. When cookies are cool, fill the thumbprints with the chocolate mixture – there will be some filling left, even though I halved the filling recipe without halving the dough recipe.

Friday, October 23, 2009

WANT {jalapeño popper dip}

For as long as I can remember, I've been a big dip girl- bean dip, dip for my Olive Garden breadsticks, cheese dip for my tortilla chips... I love me some dip! {Not so great for the diet, blah!}

This Jalapeño Popper Dip looks sooooooo delicious, don't you think? Jalapenos- love. Warm, cheesy goodness- love! Thank for sharing, Kevin from Closet Cooking. I will be making this, and several of your other yummy-sounding recipes, ASAP. :P


Jalapeno Popper Dip
(makes 4 snacks sized servings)


Ingredients:
1 (8 ounce) package cream cheese (room temperature)
1/2 cup mayonnaise
1/2 cup cheddar cheese (grated)
1/2 cup parmigiano reggiano
1 (4 ounce) can sliced jalapenos
2 jalapeno peppers (chopped, optional)
1/4 cup panko bread crumbs
1/4 cup parmigiano reggiano

Directions:
1. Mix the cream cheese, mayonnaise, cheddar cheese, parmigiano reggiano and jalapenos in a bowl and pour into a baking dish.
2. Mix the panko bread crumbs and parmigiano reggiano and sprinkle over the dip.
3. Bake in a 375F oven until bubbling on the sides and golden brown on top, about 10-20 minutes.

Monday, October 19, 2009

TIP {how to know when your cake is finished baking}

From a very young age, I could be found in the kitchen baking cakes, cookies, and brownies galore. I've always preferred my baked goods on the moist side, so it is not uncommon for my treats to exit the oven littered with several toothpicks holes.

If you're like me and have a tough time telling when your cake is ready for the cooling rack, read on for several great baking tips...


1. When the Sides Pull Away - The cake is usually done when you see the sides of the cake just start to pull away from the pan. The outer edges will look dry and you'll see a gap forming between the edge of the cake and the side of the pan.

2. When the Cake is Pillowy - The middle of the cake should feel springy and pillowy if you gently press your finger against it.

3. When a Cake Tester Comes Out Clean - Any thin skewer can be used as a cake tester, but many bakers just use a simple toothpick. If you insert it into the center of the cake, it should come out clean, with no streaks of batter. A few small crumbs are ok!

4. Take the Internal Temperature - If you're in any doubt, you can always take the internal temperature with an instant-read thermometer. The cake is done when the temperature in the middle is about 210°.

If you err on either side, err toward under-baking. In my opinion, there is no such thing as an overly moist cake. :o)

{tips via thekitchn}

Do you have any other tricks for telling when a cake is done?


Thursday, October 15, 2009

YUM {peanut noodles with shitake mushrooms}

Shitake mushrooms? Udon noodles? Peanut sauce? Yes, please! I just had to share this delicious recipe with ya'll. Click on the image to make it bigger. :o)

Tuesday, October 6, 2009

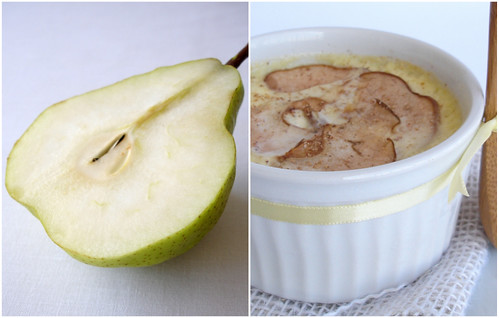
YUM {baked pear custard}

Pears are definitely one of my favorite fruits, which is why I was so excited to find piles of all different varieties the last time Evan & I went grocery shopping @ Henry's. Imagine my delight when I stumbled upon this recipe, for Baked Pear Custard, this morning on Technicolor Kitchen. Yum. I will be making these tonight, thank you!


Baked Pear Custards

2 cups heavy cream
2 eggs
1 egg yolk
1/3 cup vanilla-infused sugar {or regular sugar, whatever you have lying around!}
1 teaspoon vanilla extract
1 pear, thinly sliced
freshly grated nutmeg, for sprinkling

Preheat the oven to 300ºF.
Place the cream in a saucepan over medium heat until it just comes to the boil. Place the eggs, egg yolk, sugar and vanilla in a bowl and whisk until combined. Gradually add the hot cream, whisking constantly to combine and to avoid cooking the eggs.
Pour into four 1 ½ cup capacity ovenproof bowls/dishes and top with the pear slices. Place on a baking tray and cook for 20-25 minutes or until just set – this is a very silky dessert.
Sprinkle with nutmeg to serve – I tried them warm and cold (after a night in the fridge) and think both ways work great.

Serves 4

Wednesday, September 23, 2009

YUM {blueberry sour cream muffins}

Is it really Fall already? Down here in San Diego, we're in the middle of a crazy heat wave. Brace yourselves, SoCal people- fire season is officially in full effect, {scary!}

In celebration of the end of a great summer, and since I'm figuring some of you can still get your hands on fresh blueberries, I thought I'd share this yummy muffin recipe from Salt and Chocolate {one of my favorite cooking blogs.} Enjoy!

{via salt and chocolate}

Blueberry Sour Cream Muffins

2 cups of flour

2/3 cup of sugar + sugar for sprinkling

1 teaspoon of baking powder

1 teaspoon of baking soda

1/2 teaspoon of salt

1 cup sour cream

1 large egg, lightly beaten

2 teaspoons of vanilla

2 cups blueberries

1/4 cup butter, melted and cooled

Preheat oven to 400. Line a regular muffin pan with paper liners. In a large bowl, stir together flour, sugar, baking powder, baking soda and salt. In another bowl, stir together butter, sour cream, egg and vanilla until blended. Make a well in the center of the dry ingredients and pour in the wet. Stir until just mixed (batter will be thick) then fold in blueberries. Spoon batter into tins and sprinkle with remaining sugar. Bake 15-20 minutes or until toothpick comes out clean. Remove to rack and let cool at least 2 minutes before serving.

Sunday, September 20, 2009

WANT {a platter of these cupcakes}

Tough to choose a favorite, but that adorable little owl cupcake seems to be calling my name... Cute!!!

Friday, September 18, 2009

ADORE {this gorgeous cupcake}

OMG... the amazing damask wallpaper in the background, the fancy pearl accents, the dainty tea cup & saucer... Do you have any idea how badly I want to eat this cupcake?! Love the idea of serving a cute little dessert like this. Perfect for a bridal shower or tea party!

Monday, September 14, 2009

LOVE{incredibly delicious snacks}

Happy Monday! Sorry for going MIA on you the last couple days, but my Dad, Chris, surprised me with a little visit. Since Evan still can't walk, Dad filled in as my date for the Dave Matthews concerts {which I had been waiting for ALL YEAR!} We had a great time relaxing, rocking out to Dave Matthews, and discovering some yummy new snacks.

Behold, Vicenzi "Crema Pasticcera Mini Snacks."


Delicious. Crisp. Light. Slightly Lemony. Sweet. Addictive. Did I mention they also come in chocolate? You must try them. Dad & I found them at Mona Lisa's, an Italian restaurant and deli in Little Italy. The pastries come individually wrapped, six to a box. Trust me when I say that six was NOT enough. Buy at least two boxes. Whip up a nice, hot mug of chai tea {I like the Trader Joe's mix,} grab your Vicenzi Mini Snack, dip, and enjoy. You'll see- they're heavenly. ♥

Tuesday, September 8, 2009

LOVE {butternut squash}

Courtesy of one of my favorite blogs, The Kitchn, is a very yummy recipe for you to try this week. Mmm!

Fettucine with Roasted Butternut Squash, Brown Butter, & Sage

1 small butternut squash, about 1 pound
1 lb fettuccini noodles
3 tablespoons butter
10-15 whole sage leaves
1/3 cup cup pine nuts, lightly toasted
Dry Jack or Parmesan cheese
Salt and pepper to taste

Peel the squash, cut it into one-half inch cubes, toss with a little olive oil and salt, and roast in a single layer in a 400 degree oven for 15 minutes, or until tender and brown.

Meanwhile, cook the pasta according to package instructions. In a small skillet, over low heat, warm the butter and sage. Cook without stirring until butter turns a light caramel color.

Drain the pasta and toss while still hot with the squash, butter and sage. Add the pine nuts and top each serving with thin shavings of cheese (a vegetable peeler works well for this) and a little cracked pepper, and serve immediately.


Monday, September 7, 2009

WANT {to eat this NOW}

Grilled Cheese with Fresh Cherries. YUM!!!

Ingredients:
  • 2 cups cherries, pitted
  • 1 1/2 teaspoons sugar
  • 1/4 teaspoon salt
  • 1 teaspoon fresh thyme leaves
  • 1 baguette, thinly sliced
  • Two 5-inch wheels camembert cheese, at room temperature
  • Extra-virgin olive oil, for brushing
Directions:
  1. Preheat a grill to low. In a food processor, coarsely chop the cherries, sugar and salt; stir in the thyme.

  2. Brush the bread slices and cheese wheels on both sides with olive oil. Place the cheese in the center of the grill and surround with the bread. Cover and grill until the bread is golden on the bottom, about 2 minutes. Flip the bread slices and grill until golden on the other side, about 2 minutes more. Continue to grill the cheese, covered, until the rind is soft, about 5 minutes more. Using a metal spatula, invert each cheese wheel onto a plate.

  3. Spoon the cherry jam over the cheese and serve with the bread.

Monday, August 17, 2009

LOVE {crispy corn dogs}

Who doesn't love a deliciously crisp corn dog on a warm, summer day? Yum!

This recipe from the kitchn looks easy enough, don't you think? See, I do NEED a deep fryer, Ev! Hehe. Wish me luck. :o)


Homemade Corn Dogs
{via the kitchn}

Ingredients:
* 4 cups of oil - I used half peanut and half rice bran oil, but you could use corn oil or canola oil if you prefer.
* 1 cup yellow cornmeal
* 1 cup all-purpose flour
* 2 teaspoons salt
* 1 teaspoon baking powder
* 1/4 teaspoon baking soda
* 1/2 teaspoon cayenne pepper
* 1 (8.5-ounce) can cream-style corn
* 1/3 cup finely grated onion
* 1 1/2 cups milk or buttermilk
* 4 tablespoons cornstarch
* 8 hot dogs of your choice - beef, turkey, soy, etc.
* Disposable wooden chopsticks (optional)

Pour oil into a deep fryer or large heavy pot and heat to 375 degrees F. I used a deep metal saucepan. I don't have a thermometer, so I set the stovetop dial to medium-low heat ("3" on my stove.)

In a large mixing bowl, combine the cornmeal, flour, salt, baking powder, baking soda, and cayenne pepper. In a separate bowl, combine the creamed corn, onion, and milk. You can substitute buttermilk for milk if you like.

Add the wet ingredients to the dry ingredients and combine. Don't worry if there are lumps, this is okay. If it's too dry, add a little bit more milk.

Scatter the cornstarch on a plate. Roll each hot dog in the cornstarch and coat evenly with a thin layer of cornstarch, like you are powdering a baby's butt. you don't want huge clumps of cornstarch on the hot dogs.

Insert a chopstick into each hotdog - note, I didn't use chopsticks in mine because I'm not particular about having my corndogs on a stick. It is totally up to you. Check the oil to see if it is hot enough or too hot. I added a tablespoon of batter to the oil to see how it cooked. If it gets too dark too fast, your oil is too hot and you should lower the heat. If it turns nicely golden and crispy, it's just right. Next, dip a dog in the batter, and then carefully place it in the hot oil, and cook until the coating is golden brown, about 2 to 4 minutes. With tongs, remove the corndog and drain on paper towels before eating.

Thursday, July 30, 2009

WANT {pb + j pops}

Martha Stewart has gone and done it again. These PB + J Pops look incredible! I must make them tonight. :o)

PB + J Pops

Ingredients

Makes About 20

  • peanut butter swirl ice cream (below)
  • 1 pound graham crackers
  • 16 ounces strawberry jam
  • 1 cup unsalted peanuts, chopped (optional)
Directions
  1. Transfer ice cream and parchment lining from larger pan to a flat surface. Cut ice cream into 12 squares, 2 1/2 inches each. Transfer to a parchment-lined baking sheet; freeze at least 3 hours. Repeat with smaller pan, making 9 squares.
  2. Break graham crackers in half to make 2 1/2-inch squares. Spread one side of each with about 1 1/2 teaspoons jam; freeze until firm, about 45 minutes (this keeps finished pops neat). Sandwich ice-cream squares between graham crackers, jam facing ice cream. Insert a wooden pop stick into each.
  3. Place peanuts in a bowl (if using); dip each side of the pop in the nuts. Pat gently with your hand to adhere. Pops can be frozen at this point, wrapped in plastic wrap or layered between waxed paper in an airtight container, for up to 2 weeks.

Peanut Butter Swirl Ice Cream


Ingredients

Makes about 1 1/2 quarts

  • 6 large egg yolks
  • 3/4 cup plus 2 tablespoons sugar
  • 2 cups milk
  • 2 cups smooth peanut butter
  • 2 cups very cold heavy cream
  • 1 teaspoon pure vanilla extract
Directions
  1. Line one 8-by-12-inch glass or metal baking pan and one 8-by-8-inch glass or metal baking pan with parchment paper.
  2. Fill a large bowl with ice and water; set aside. Combine egg yolks and sugar in the bowl of an electric mixer fitted with a whisk attachment. Beat at medium-high speed until very thick and pale yellow, 3 to 5 minutes. (Alternatively, whisk egg yolks and sugar together in a medium bowl.)
  3. In a medium saucepan, bring milk just to a simmer. With mixer running on low, use a measuring cup or ladle to slowly pour about 1/2 cup of the hot milk into the egg-yolk mixture, beating constantly until blended. Continue, adding about 1/2 cup milk at a time, until all has been added.
  4. Return mixture to saucepan; cook over medium-low heat, stirring constantly with a wooden spoon, until mixture is thick enough to coat back of spoon, 3 to 5 minutes. The custard should retain a line drawn across back of spoon with your finger. Whisk in 1 cup peanut butter.
  5. Remove pan from heat, and stir in cold heavy cream. Pour custard through a mesh strainer into a medium bowl set in the ice bath; stir occasionally until cool. Stir vanilla into cooled custard. Cover bowl and refrigerate at least 30 minutes or overnight.
  6. Pour the custard into a chilled ice-cream maker; freeze according to manufacturer's instructions. (The ice-cream mixture will be set but not hard.)
  7. Swirl in remaining cup of peanut butter; transfer two-thirds of the soft ice cream, or 1 quart, to larger baking pan, smoothing the surface with an offset spatula. Transfer remaining third (1/2 quart) to smaller pan, smoothing its surface. Cover each pan with plastic wrap; freeze overnight. Ice cream may be made to this point up to one week ahead.

Sunday, July 26, 2009

LOVE {the perfect mojito}

Here you go ladies- a recipe for the perfect mojito (featured at Saturday's 'Movie Under the Stars' party.) :o)

Now, it wouldn't be right for me to take full credit for this deliciously refreshing concoction. These mojitos made their first appearance at my bridal shower, hosted by the lovely Jennifer. They are so crisp, not too sweet, and just strong enough. How can you go wrong with a drink recipe that lists measurements "by the glass," or "by the bucket"? This recipe truly makes the perfect mojito. Yum!


Mojitos by the glass

  • 10 fresh mint leaves
  • 1 tablespoon of lime juice
  • 2 tablespoons white sugar, or to taste
  • 1 1/2 fluid ounces white rum
  • 1/2 cup club soda
  • Splash of Sprite
In a glass, combine lime juice, rum, club soda and Sprite. Add sugar and stir until dissolved. Chop mint or use a muddler to release mint oils. Add toglass. Serve with ice, garnish with a slice of lime. Makes one serving.

Mojitos by the bucket

  • Handful of fresh mint leaves
  • 1 cup of lime juice
  • 3 ¼ cup of white sugar
  • 5 cups white rum
  • 12 cups club soda (Did you know that Smart & Final sells 2 liters of club soda?)
  • I cup of Sprite
In a large bowl, combine lime juice, rum, club soda and Sprite. Add sugar and stir until dissolved. Chop mint or use a muddler to release mint oils. Add to mixture. Serve with ice, garnish with a slice of lime. Serves about 25.

Friday, July 24, 2009

LOVE {vanilla spice walnuts}

As promised, here is the recipe for my "Other Mother" Melissa's incredible Vanilla Spice Walnuts. Dad + Melissa sent an assortment of flavor-roasted almonds, pine nuts, peanuts, pecans, and walnuts as part of Evan and my birthday package. Lucky us, right?! If you like cinnamon sugar toast, you will LOVE these.

Evan and I have tried these nutty treats plain, in cereal, + crushed on top of Evan's Cannoli Cake. I can imagine they would also be delicious sprinkled over a bowl of vanilla ice cream, in a chicken + mixed berry salad, or mixed in with some banana nut bread batter. Mmm!


Melissa Janney's Vanilla Spice Walnuts

INGREDIENTS
4 cups raw walnut halves
2 TB unsalted butter, melted
6 TB granulated sugar
1 TB vanilla extract {if the nuts appear dry, use more}
1 TB vanilla powder
1 1/2 tsp cinnamon
1 tsp nutmeg
1 tsp kosher salt
1/2 tsp freshly ground black pepper
1/4 tsp cayenne pepper (optional)

Pre-heat oven to 300 degrees

Combine raw walnut halves and melted butter, toss and coat well.Sprinkle granulated sugar and add vanilla extract, toss and coat well.Set aside for at least 10 minutes.

While the nuts are resting, mix together the vanilla powder, cinnamon, nutmeg, salt and pepper{s}, set aside - do not add to nuts yet.

After the nuts have rested, spread them in a single layer on a baking sheet covered with parchment paper.Bake for approximately 30 minutes or until toasted. I usually turn them over at least once during baking to ensure even cooking.

Once the nuts are fully roasted, remove from the oven and sprinkle with the spice mixture. Stir and toss carefully to coat well.I usually end up sprinkling more vanilla powder at the end because there's no such thing as too much of a good thing!

Tips:
  • I've had very good success with the Costco walnuts. They are well priced, fresh and very meaty. Trader Joe's is also a good source.
  • If the spice mixture doesn't seem to be sticking to the nuts or if they aren't crunchy enough reduce temp (try 225 deg) and bake longer. Follow your nose for doneness.
  • If you keep your walnuts in the freezer like I do, be sure to let them come up to room temperature before you add the melted butter or the butter will harden up and not spread evenly which means the sugar won't stick evenly either.
  • I prefer using freshly ground salt or coarser grain kosher salt because I like the occasional bite of salt instead of the whole nut tasting salty.
Yum, yum, yum! Please leave your feedback in the comments section so I can pass it along to Melissa. :o)

Thursday, July 23, 2009

WANT {you to try this cannoli cake recipe}

Here you go- the easiest, most delicious cannoli cake recipe. I can honestly say it is the best birthday cake I've ever had. Yum!


Easy Breezy Cannoli Cake

1 regular cake mix {any flavor will work, we used "yellow"}
1 lb. ricotta cheese
3/4 c. sugar
3 eggs
1 tsp. vanilla
a couple handfuls of semi-sweet chocolate chips

Make box cake mix according to instructions. Grease only bottom of 9x13x2 inch pan. No flour. Combine ricotta cheese, sugar, eggs, and vanilla. Beat slowly until very smooth. Pour over cake batter gently. It will sink to bottom while baking. Bake 45-60 minutes at 350 degrees. When cool, frost with {this vanilla cream frosting}. Roughly chop chocolate chips and sprinkle on top.

This cake is also very yummy with some crushed Vanilla Spice Walnuts + fresh strawberries sprinkled on top. I'll have to get the recipe for the walnuts from my other mother, Melissa. Stay tuned. :o)

Enjoy!

Monday, July 20, 2009

LOVE {this vanilla cream frosting}

Ok, so I helped a litttttle bit with my birthday cake. Hehe. The recipe Evan used for my cannoli cake didn't call for frosting (what?!), so I made this simple, yummy Vanilla Cream Frosting from the Good Housekeeping Book of Desserts. It was just perfect for Evan's rich, creamy cannoli cake, but it would be equally delicious on angel food or chocolate cake, or a bowl of fresh fruit. Yum!!


VANILLA-CREAM FROSTING
  • 3 tablespoons margarine or butter , softened
  • 3 tablespoons milk
  • 1 3/4 cups confectioners sugar
  • 3/4 teaspoon vanilla extract
  • 2 cups whipping cream
In small bowl, with mixer at medium speed, beat 3 Tablespoons margarine or butter, softened, 3 Tablespoons milk, 1 3/4 cups confectioners’ sugar, and 3/4 teaspoon vanilla extract until smooth, adding more milk if necessary until mixture has an easy spreading consistency.

In large bowl, using same beaters and with mixer at medium speed (or using your KitchenAid whisk attachment, like I did!), beat 2 cups heavy or whipping cream until stiff peaks form; fold confectioners’-sugar mixture into whipped cream.

Enjoy!

LOVE {birthdays with the husband}

While most women don't particularly like birthdays, Evan made it almost impossible not to LOVE every minute mine. From the cannoli cake he baked when we first woke up (Evan doesn't bake AT ALL, so this was a huge deal,) to my sweet card and gift (a cook book, mmm,) the fun time we had at Moonlight Beach with The Conte's, our frozen yogurt/movie date, the million times he said "Happy Birthday," and the incredible birthday dinner he made, it was just about the most perfect day ever.

Here's a picture of Evan's adorable cannoli cake. Thanks, Ev. You are the best. ♥

Blog Widget by LinkWithin